Configuring Email Clients
All users with CS computer accounts can use this guide to configure their email on phones, computers, and tablets. It contains information on configuring various email clients for Linux, Windows and Mac. Your default email address is username@cs.uky.edu. If you need a different address, please send a request to help@cs.uky.edu.
Android
Step 1
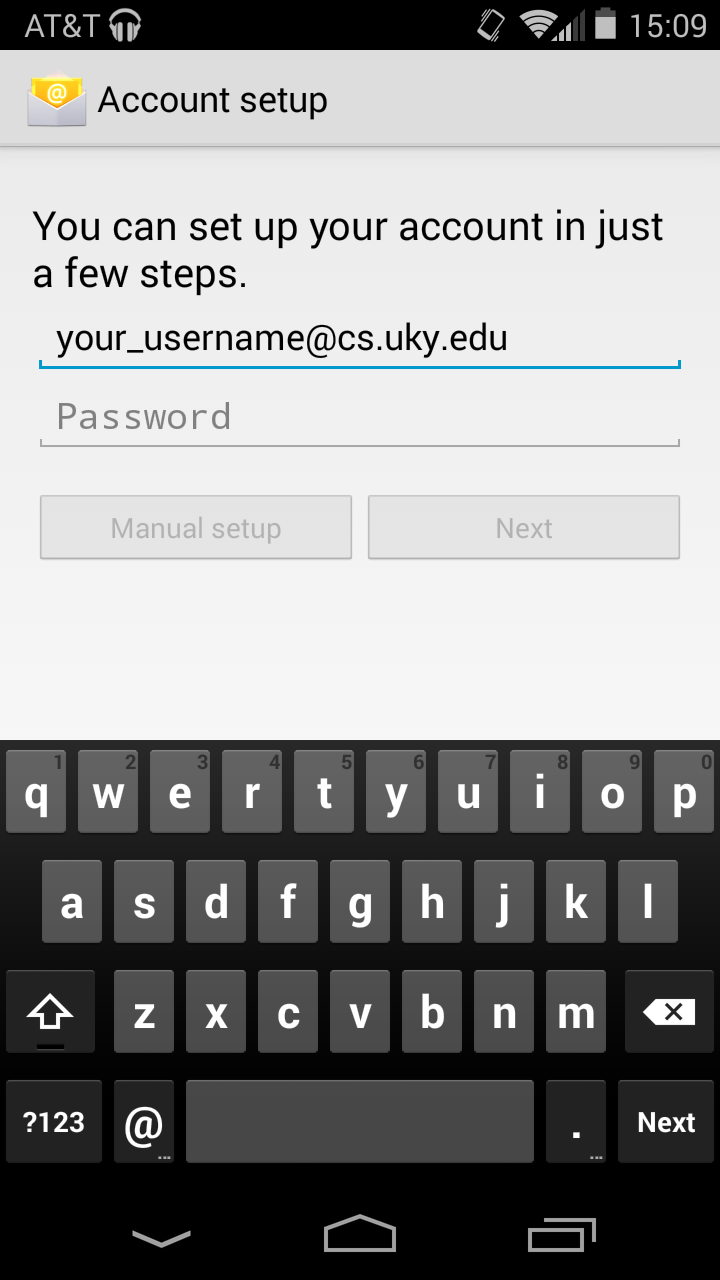
- Navigate to the “Email” application, or select ‘Add account’ in the
Settings Application. You then get the screen shown below.
- In the first field, enter your email address, which is
username@cs.uky.edu.
- Enter your CS account password. Note: This password need not be your
LinkBlue password.
Tap Next
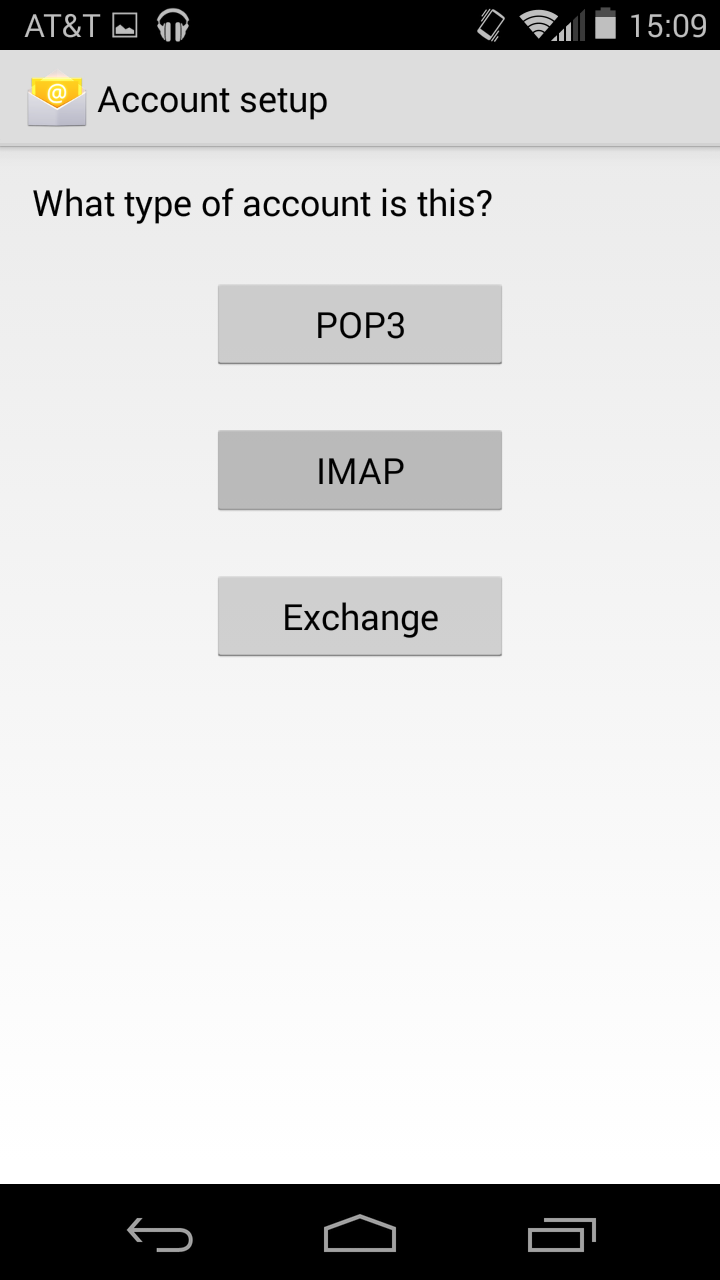
Step 2
Select IMAP
Step 3
- The username field shows your full email address. Delete the
@cs.uky.edu part so it is just your username. Fill in the other fields like this:
Mail Server: mail.cs.uky.edu
Port: 993
Security type: SSL/TLS (Accept all certificates)
Leave the IMAP path prefix field blank
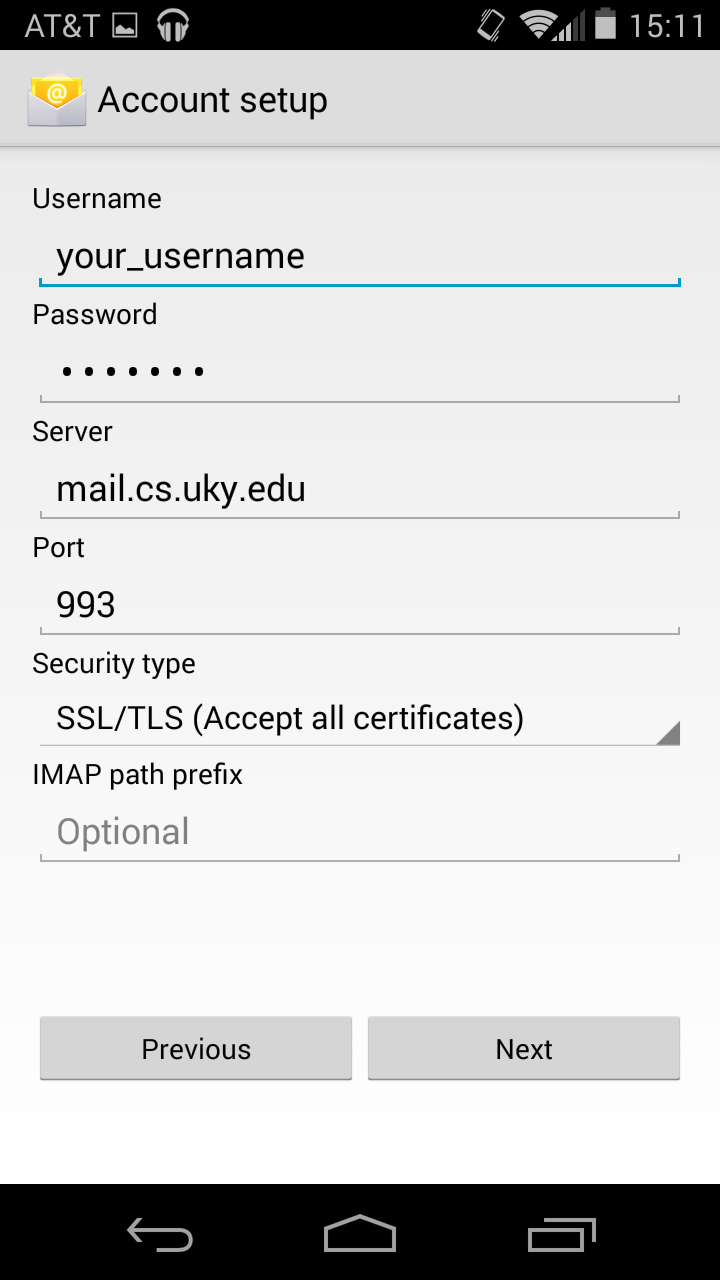
Tap Next
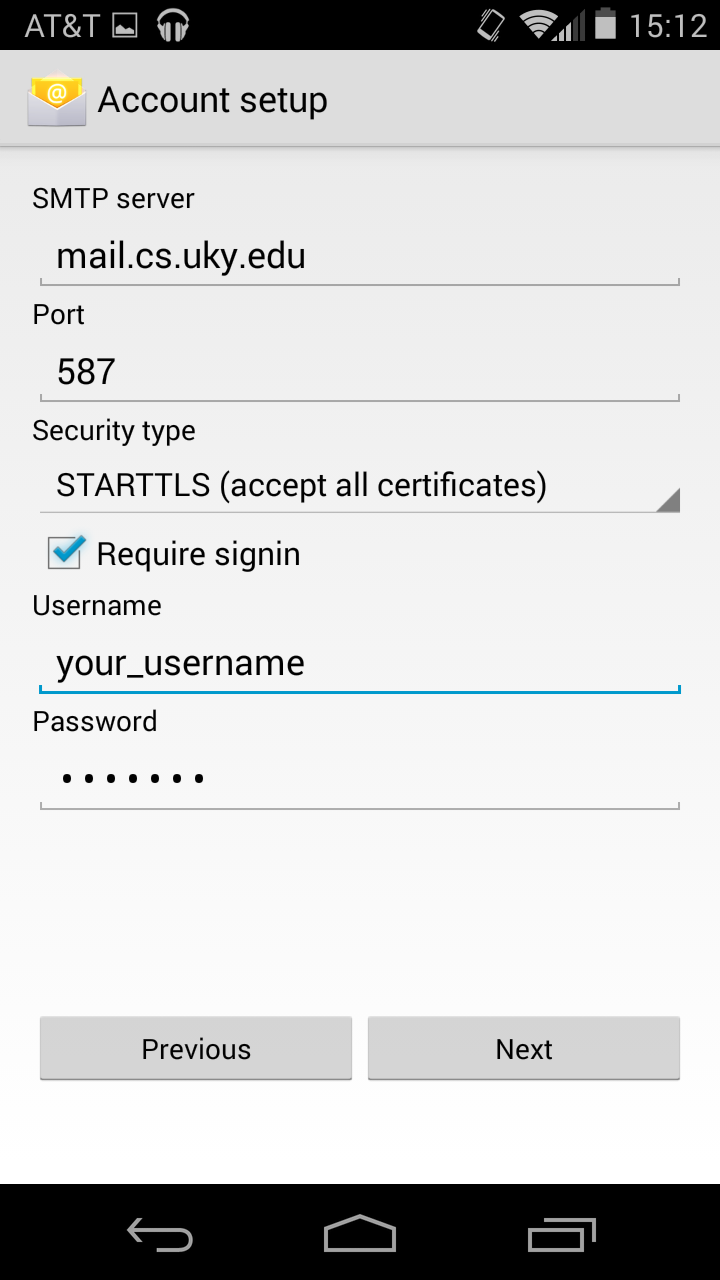
Step 4
Use the following settings for SMTP:
SMTP server: mail.cs.uky.edu
Port: 587
Security type: STARTTLS (Accept all certificates)
Check Require signin and enter your username (without @cs.uky.edu) and password.
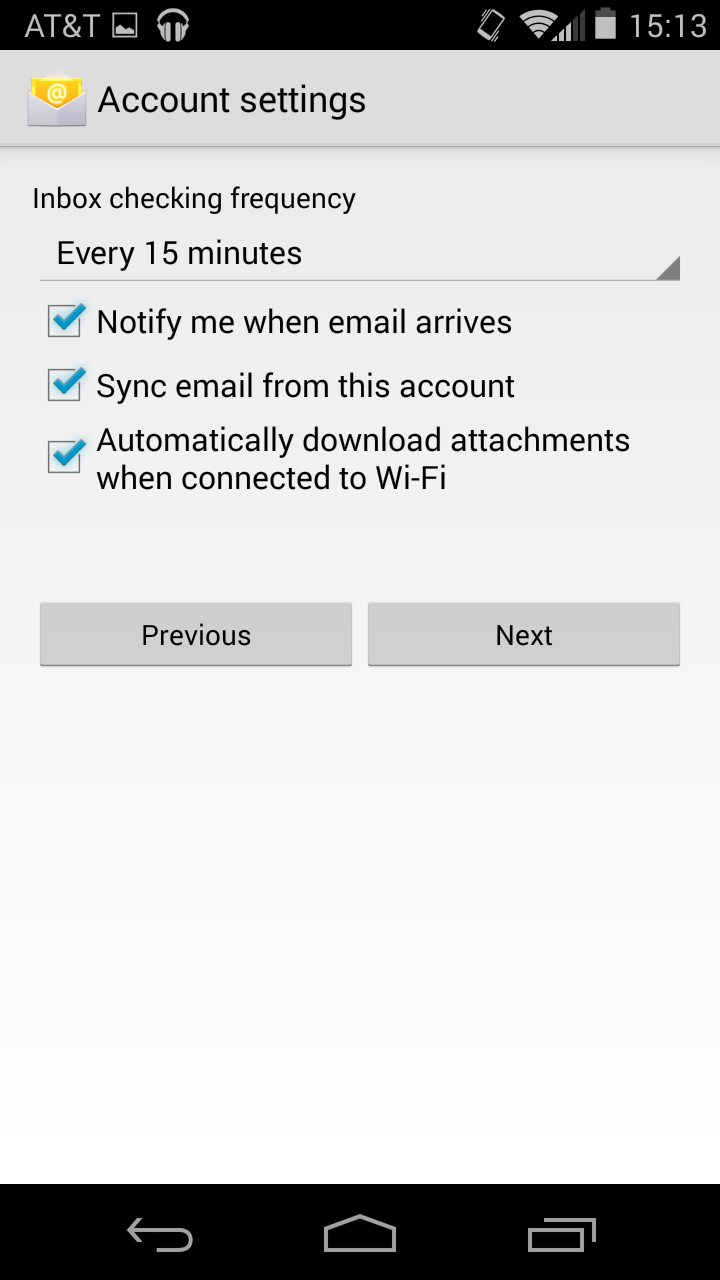
Step 5
These settings are your personal preference, however, note that a slower check frequency will use less battery.
Tap Next
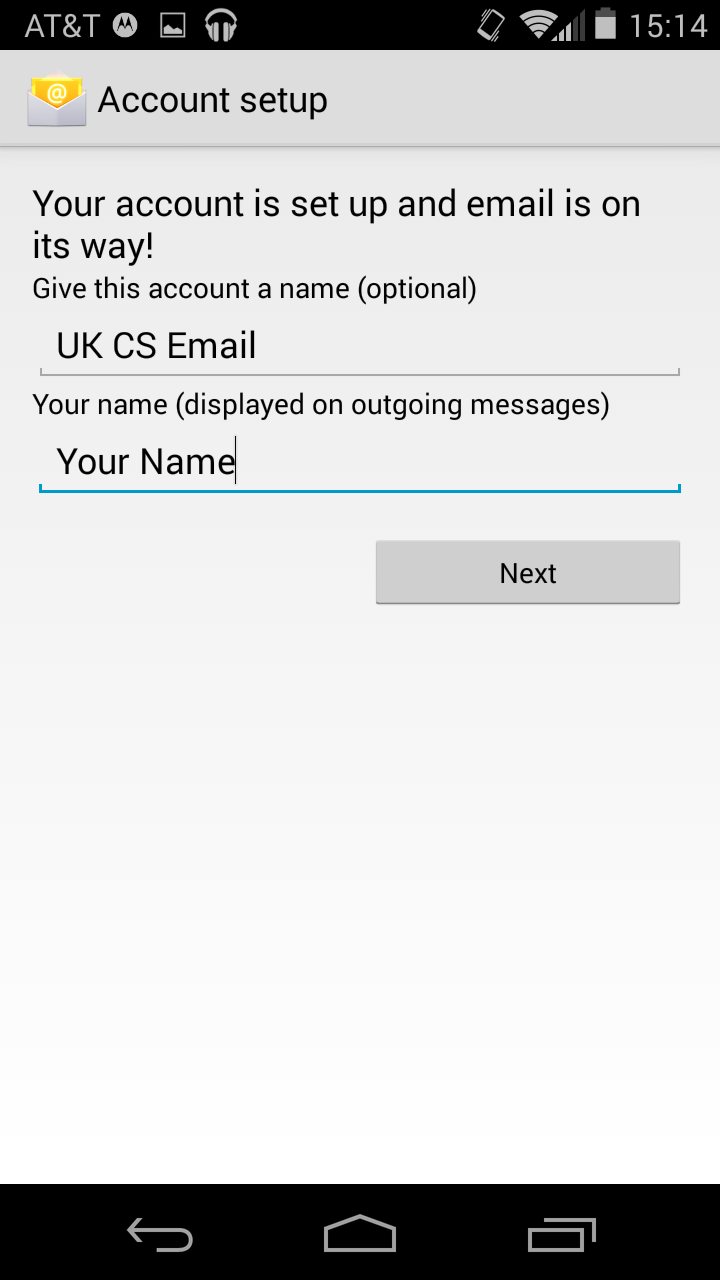
Step 6
Give the account a name, e.g. ‘CS Mail’
Your name will probably already be filled in.
Tap Next, and you’re done!
iOS
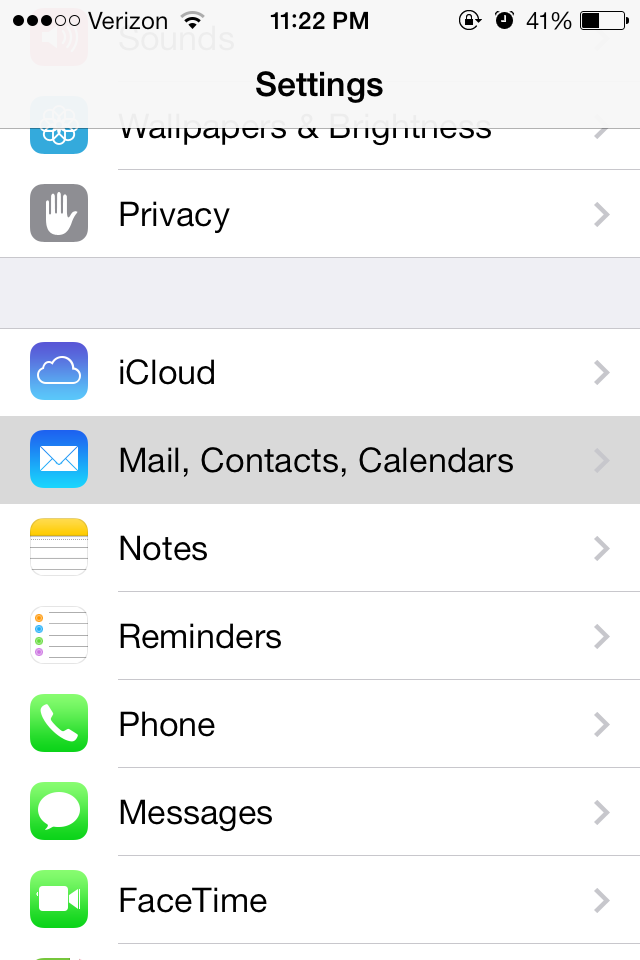
Step 1
Select Mail, Contacts, Calendars from the Settings app.
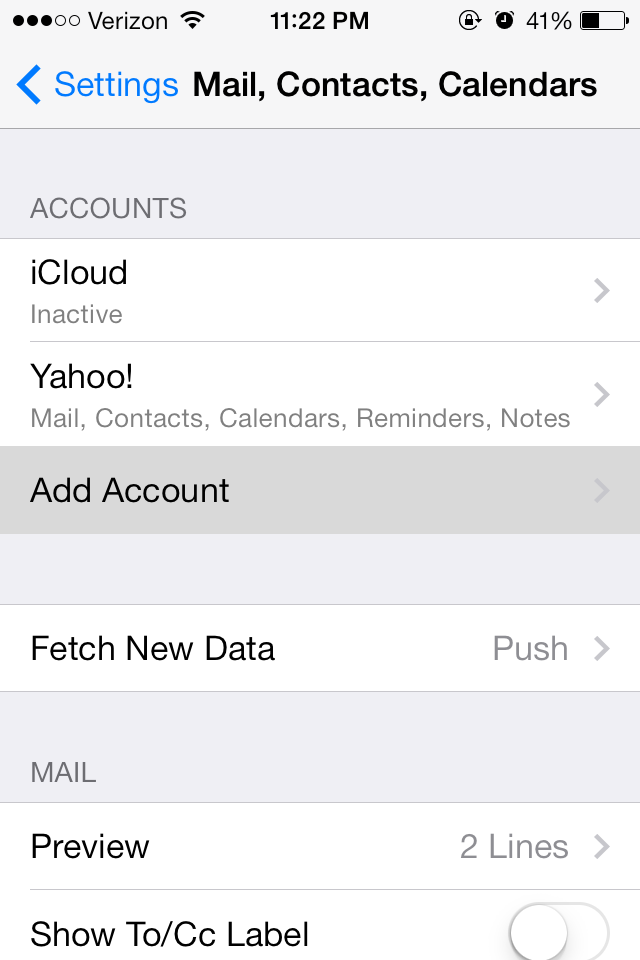
Step 2
Select Add Account.
Step 3
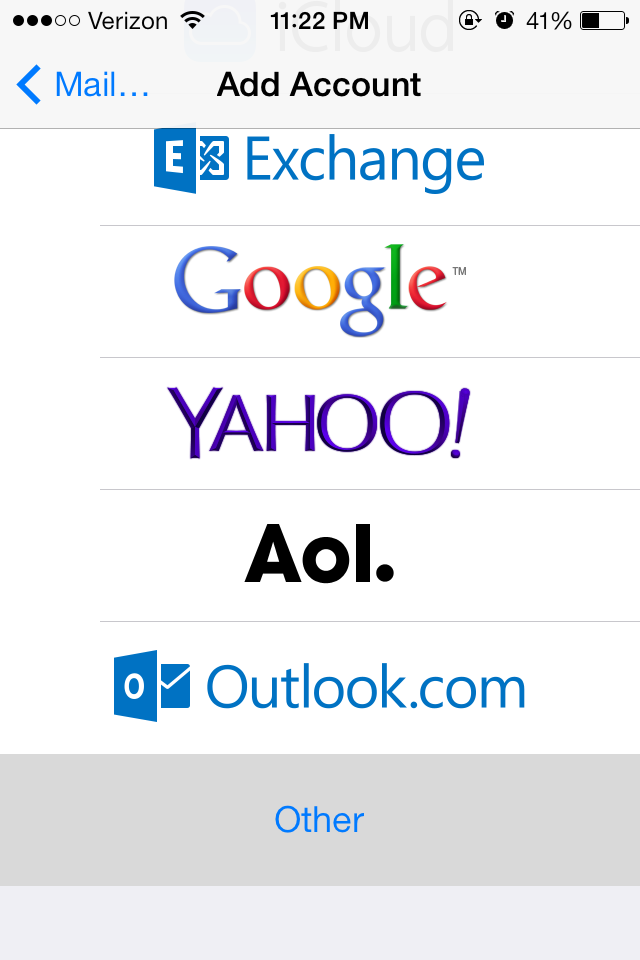
Choose Other at the bottom of the list.
Step 4
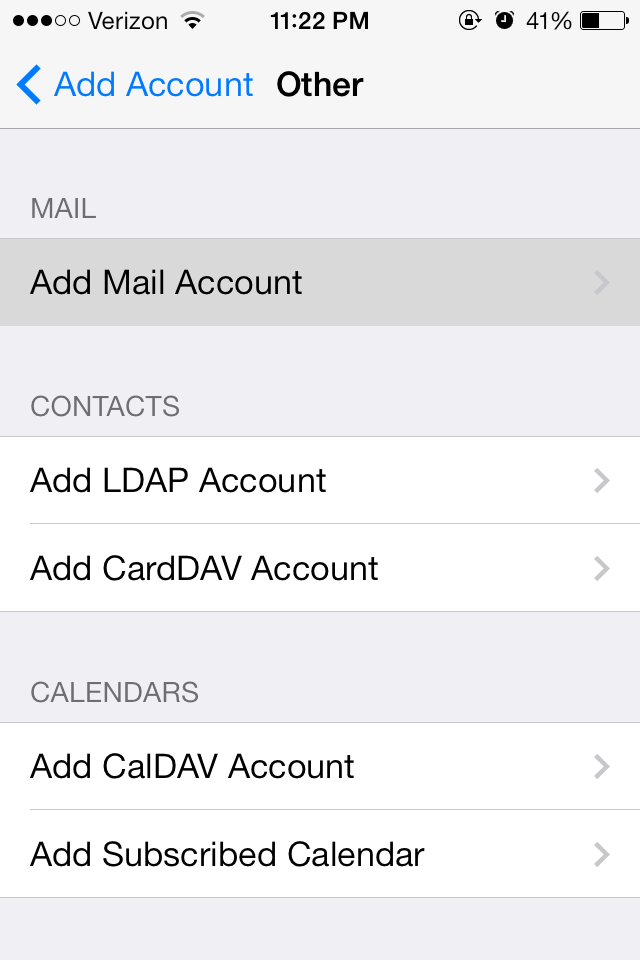
Select Add Mail Account.
Step 5
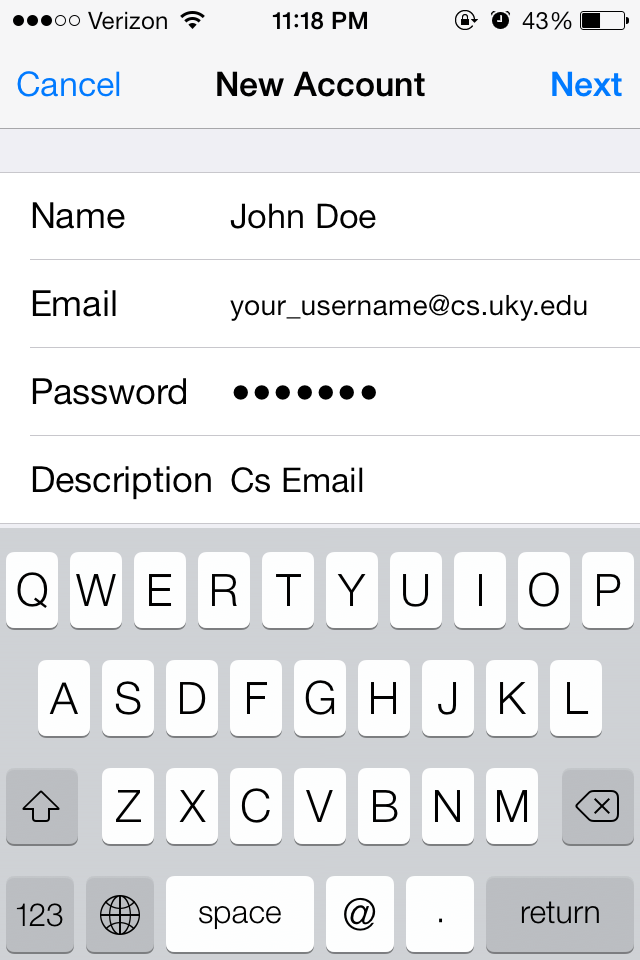
Enter your name as you want others to see it.
Enter your email address, which is your CS account username @cs.uky.edu.
Enter your CS account password, note this is not your LinkBlue password.
Enter a description for the account, e.g. CS Email.
Tap Next.
Step 6
Make sure IMAP is highlighted at the top of the screen.
Name, Email and Description should already be filled in with the information from the previous page.
Scroll down to Incoming Mail settings.

Step 7
Host Name: mail.cs.uky.edu.
User Name: your CS account username.
Password should already be filled in.
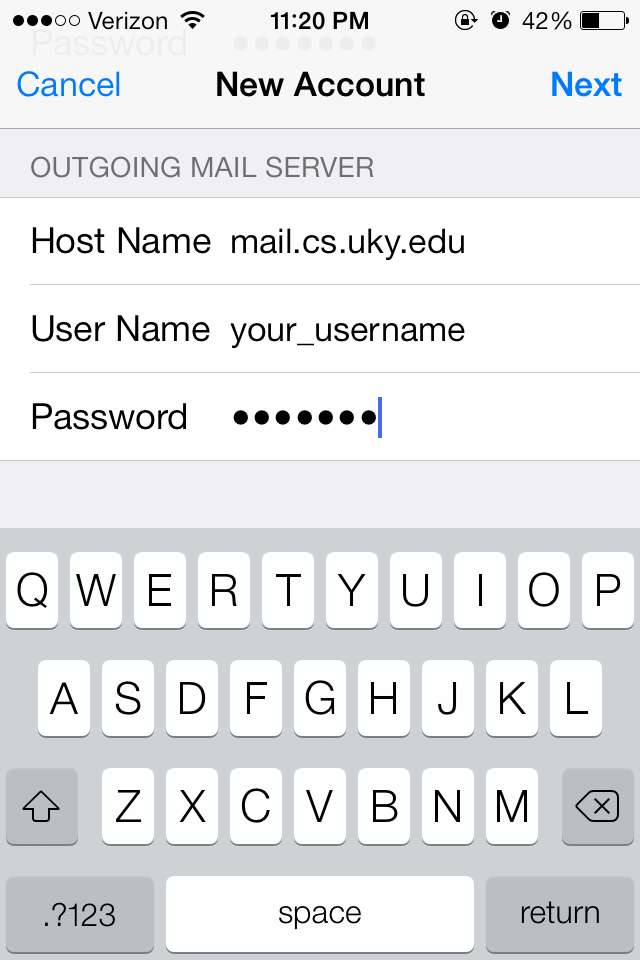
Scroll down to Outgoing Mail settings.

Step 8
Hostname: mail.cs.uky.edu.
Username: your CS account username.
Password: the same password you entered before, your CS account password.
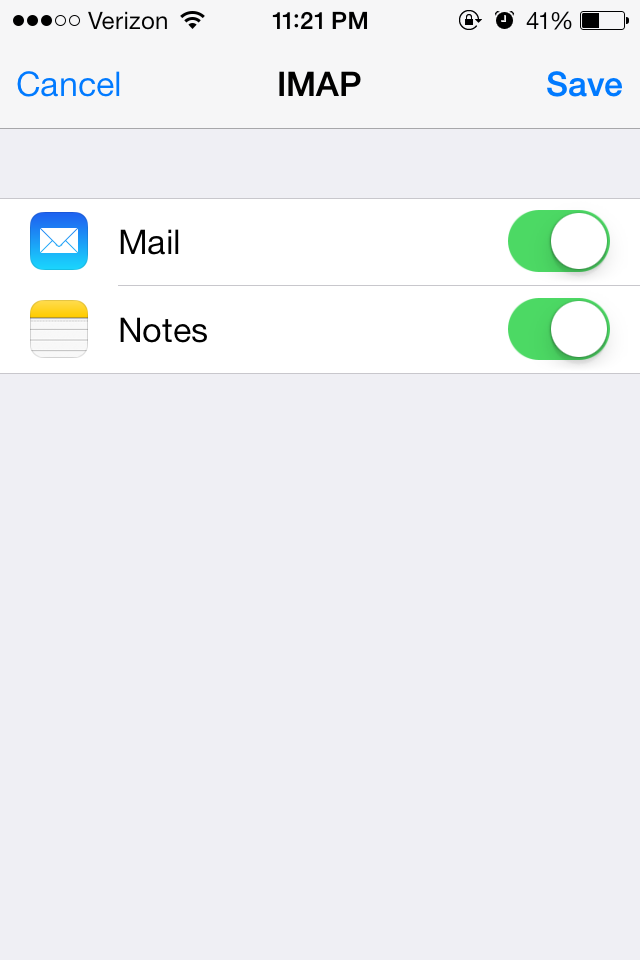
Step 9
All that matters here is that you leave Mail turned on, otherwise you won’t receive email.
Synchronizing Notes is optional.
Tap Save and you’re done!.
Mozilla Thunderbird
Step 1
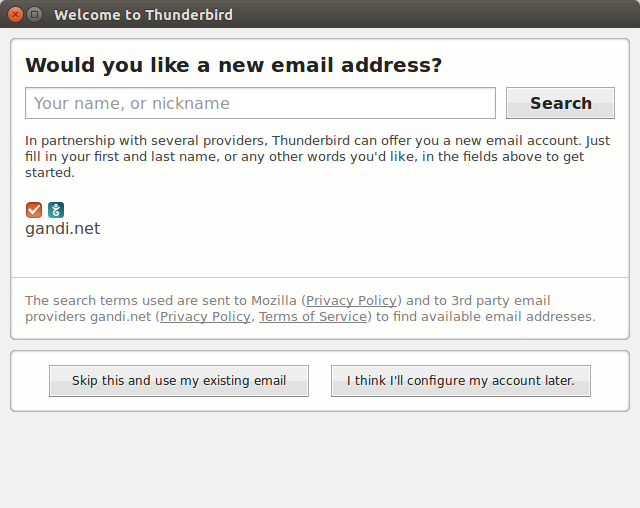
Open the Thunderbird Mail application, which will bring you to the first pop-up screen.
Click “Skip this and use my existing email” to proceed.
Step 2
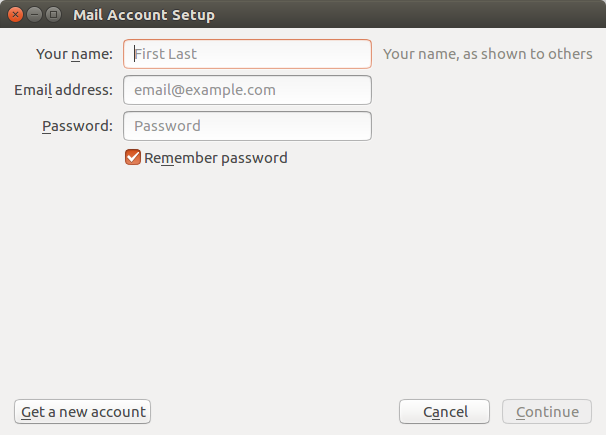
After completing step 1, you will be presented with the screen on the right.
In the first field, enter your first and last name.
In the second field, enter your email address, which is your cs account username, followed by @cs.uky.edu (i.e myusername@cs.uky.edu).
In the third field, Enter the password associated with your CS account.
Tap continue.
Step 3
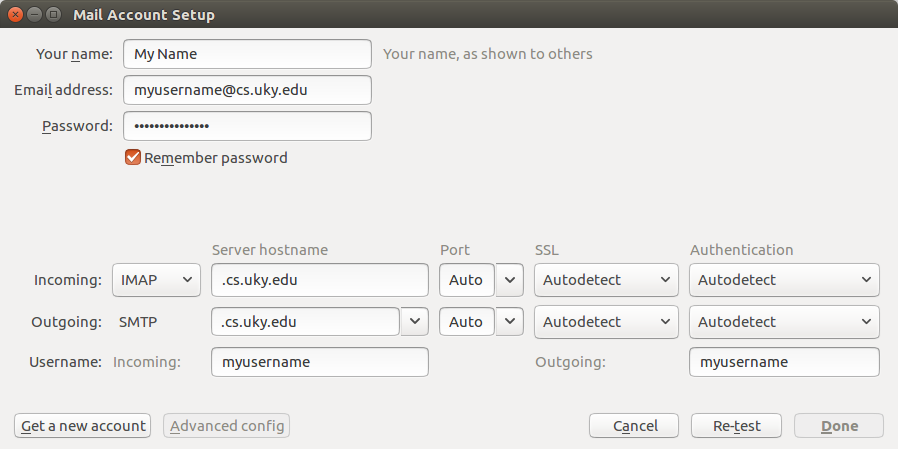
Click Manual config in the bottom left hand corner of the window. Note that you do not need to wait for thunderbirds search process to finish, as thunderbird cannot proceed until we enter the required information in manual config. Clicking manual config, presents you with the following screen.
First, enter the appropriate information for the
Incoming:line. Also make sure that IMAP is selected in the first box on this line.:Server hostname: mail.cs.uky.edu Port: 993 SSL: SSL/TLS Authentication: Autodetect
Next, enter the appropriate information for the Outgoing: line.:
Server hostname: mail.cs.uky.edu
Port: 587
SSL: STARTTLS
Authentication: Autodetect
Lastly, make sure your username is in both boxes on the third line labeled “Username:” and then tap “re-test”.
Step 4
If the test completes successfully, then go ahead and tap Done.
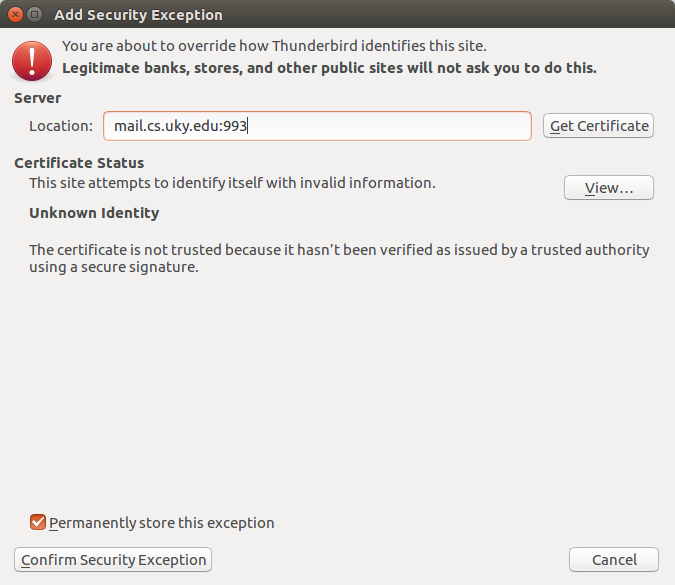
Finally, when prompted with the screen on the right, go ahead and click Confirm Security Exception to finalize your setup, and your done!
Please Note that the first time you send a message with your account, a similar security prompt will pop up in the background. Just click Confirm Security Exception a second time, to be able to send mail.
Outlook
Step 1
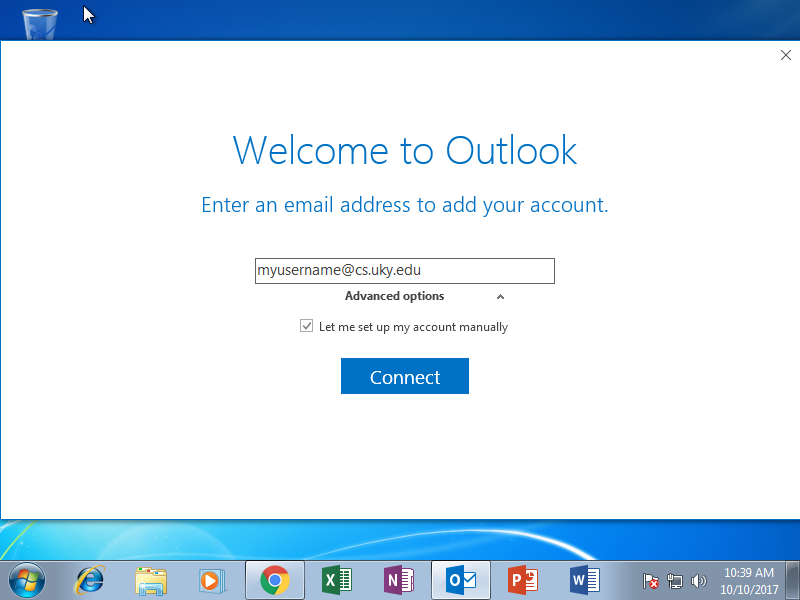
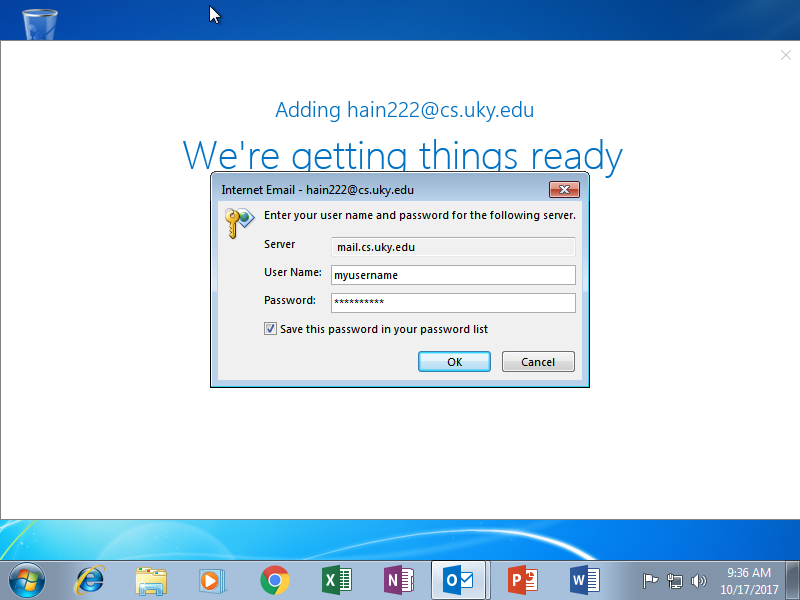
After opening the outlook application, enter your cs username without @cs.uky.edu, (i.e myusername where your email address is myusername@cs.uky.edu) and underneath the advanced options bar, select “Let me set up my account manually”.
Step 2
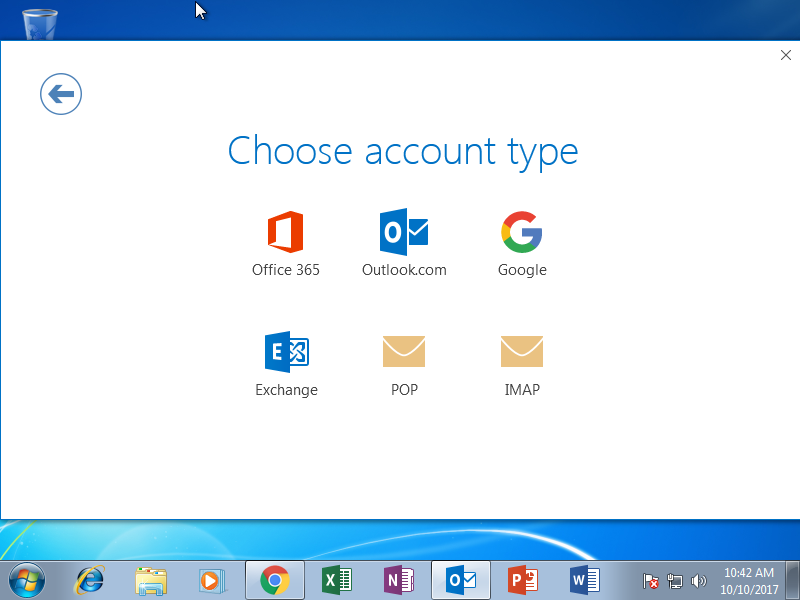
On the next menu be sure to select IMAP.
Step 3
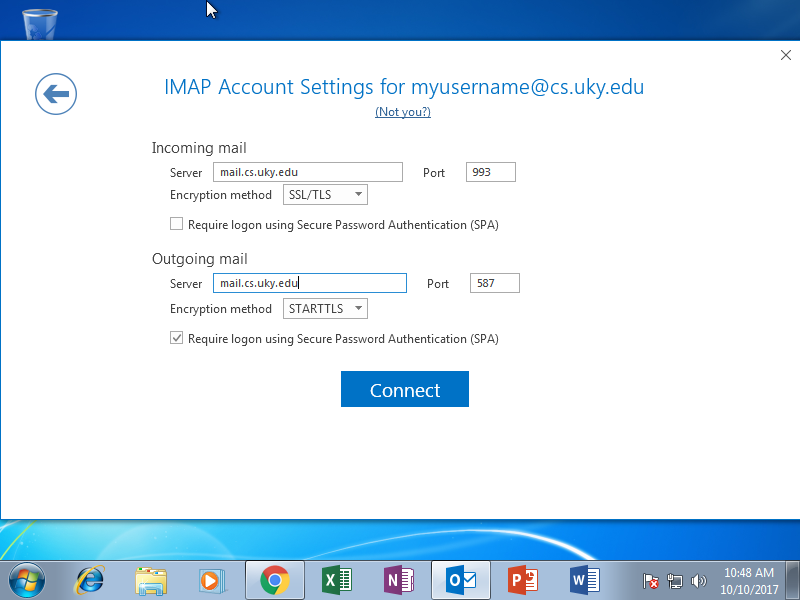
Now fill in all the required information into their respective boxes.
Incoming mail:
Server: mail.cs.uky.edu
Port: 993
Encryption Method: SSL/TLS
Outgoing mail:
Server: mail.cs.uky.edu
Port: 587
Encryption Method: STARTTLS
Make sure to check “Require logon using Secure Password Authentication” for outgoing mail only.
Step 4
Outlook will now attempt to connect to the server and test, if it is successful it will automatically proceed to the next screen.
On the final screen, uncheck the box that asks you to set up outlook on your mobile phone, and click OK to proceed, and your done!
Apple Mail
Step 1
Open the Mail application, select Mail->Accounts and select the bottom one “Add Other Account”.
Select “Add a Mail Account” and click Create.
In the fields, enter your name, email address, which is your CS account username @cs.uky.edu
Enter your CS account password, note this is not your LinkBlue password.
Click Create
Upon Discovering settings hit Next when it enables

Step 2
- Select IMAP
- Mail server: mail.cs.uky.edu
- User name: your_username
Password: your_password
Click Next
It will state “Signing in….”

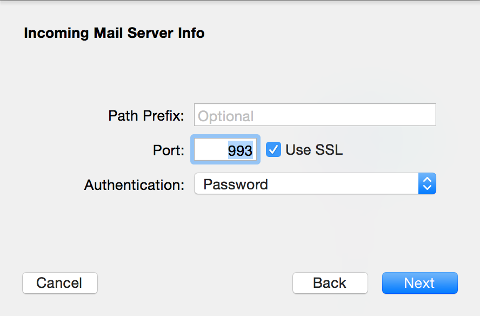
Step 3
If that fails, you may have to give more info:
Leave the IMAP path prefix field blank
Port: 993
Check Use SSL
Authentication: Password
Step 4
- SMTP server: mail.cs.uky.edu
- User name: your_username
Password: your_password
Click Create
Port: 587
Security type: STARTTLS (Accept all certificates)
If Require signin is not checked, check it and enter your username and password

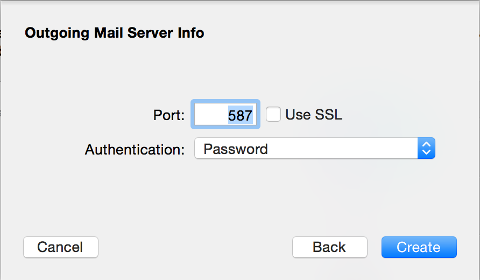
Step 5
If that fails, you may have to give more info:
Port: 587
Authentication: Password
Mutt
Per the Mutt web site -
Mutt is a small but very powerful text-based mail client for Unix and Unix like operating systems.
Note
This document uses the standard conventions for running commands. A command that begins with # is to be run as the superuser and commands that are to be run as a standard user account begin with $.
Mutt can be installed on Ubuntu via # apt-get install mutt and on MacOS with homebrew by running $ brew install mutt.
You will use GPG encryption to store your password. You will need to install
that as well. On Ubuntu, run # apt-get install gnupg2; on MacOS run $ brew install gpg.
Generate a GPG key by running $ gpg --full-gen-key.
Note
Some versions of GPG use the command gpg2 in place of gpg. The
commands are the same otherwise. If your system uses gpg2 be sure to
modify the command used to decrypt the password in the below configuration
(or create an alias).
Use the defaults for the kind of key and keysize and set the key to never expire then enter in your personal information when setting up the user ID. The Real Name should be both first and last name and the comment section can be anything you like, i.e. mail password key. If everything looks correct type “O” for okay.
To encrypt the password run the following command:
$ echo "password" | gpg --encrypt --recipient "Real Name" -o ~/.mutt/accounts/mail-passwd.gpg
Where password is your cs account password and Real Name is your Real Name used when you generated your key in the step above.
Once the above task are complete, create .muttrc in your favorite text editor, e.g. $ vi ~/.muttrc, and add the following:
# Personal Information
set from = "username@cs.uky.edu"
set realname = "Firstname Lastname"

# Credentials **Remember to change gpg to gpg2 if your system uses that command**
set my_encrypted_pass = "`gpg --quiet --for-your-eyes-only -d ~/.mutt/accounts/mail-passwd.gpg`"
set imap_user = "username"
set imap_pass = $my_encrypted_pass
set smtp_url = "smtp://username@mail.cs.uky.edu:587/"
set smtp_pass = $my_encrypted_pass

# Mailboxes
set folder = "imaps://mail.cs.uky.edu:993"
set spoolfile = "+INBOX"

# Storage Location
set postponed = +[mail]/Drafts
set header_cache = ~/.mutt/cache/headers
set message_cachedir = ~/.mutt/cache/bodies
set certificate_file = ~/.mutt/certificates

# Etc
set move = no
set mail_check = 30
set sort = threads
set editor = "vim"
set smtp_authenticators = 'gssapi:login'

# To add a signature to your emails, create it in ~/.signature and uncomment the following
#set signature="~/.signature"
# GnuPG bootstrap - you will know if you need to use this
#source ~/.mutt/gpg.rc
Attention
You will be prompted to enter the decryption password upon startup of mutt.
A very handy cheat sheet for using mutt can be found here For more information on using mutt please see the official mutt website - http://www.mutt.org.